
KitchenAid refrigerators have long been prized for their sleek designs and impressive features, making them popular in many households. However, even the most reliable appliances can encounter hiccups from time to time. In this comprehensive guide, we’ll delve into the world of KitchenAid refrigerators, shedding light on their reliability and the common issues that can arise.
But here’s the good news – you don’t always need a technician at your doorstep! We’ll focus on DIY troubleshooting and repair solutions to help you get your KitchenAid refrigerator back to its cooling glory. So, let’s roll up our sleeves and dive into the world of KitchenAid refrigerator troubleshooting, as we address 17 common problems and their fixes. Your kitchen’s cooling champ will be running smoothly in no time!
Table of Contents
Understanding Your KitchenAid Refrigerator
KitchenAid offers a range of refrigerator models known for their quality and innovation, catering to diverse consumer needs. Their refrigerator lineup includes:
1. French Door Refrigerators:
- Spacious and versatile interiors.
- Tri-sensor climate control for optimal food preservation.
- Adjustable shelving and humidity-controlled crispers.
2. Side-by-Side Refrigerators:
- Convenient vertical split design with freezer on one side.
- External water and ice dispensers for easy access.
- Adaptive defrost technology to reduce freezer frost buildup.
3. Bottom-Freezer Refrigerators:
- FreshChill temperature management for ideal freshness.
- Pull-out freezer drawer for organized storage.
- Full-width pantry drawers for storing wide items.
4. Built-In Refrigerators:
- Seamless integration into cabinetry for a sleek look.
- Preserva Food Care System to extend food freshness.
- Soft-close drawers for a premium touch.
5. Counter-Depth Refrigerators:
- Flush installation for a streamlined appearance.
- Interior water dispensers for clean exterior lines.
- Max Cool feature for quick temperature adjustments.
KitchenAid refrigerators are known for their durability, performance, and modern design, making them a popular choice for homeowners seeking reliable and stylish cooling solutions for their kitchens.
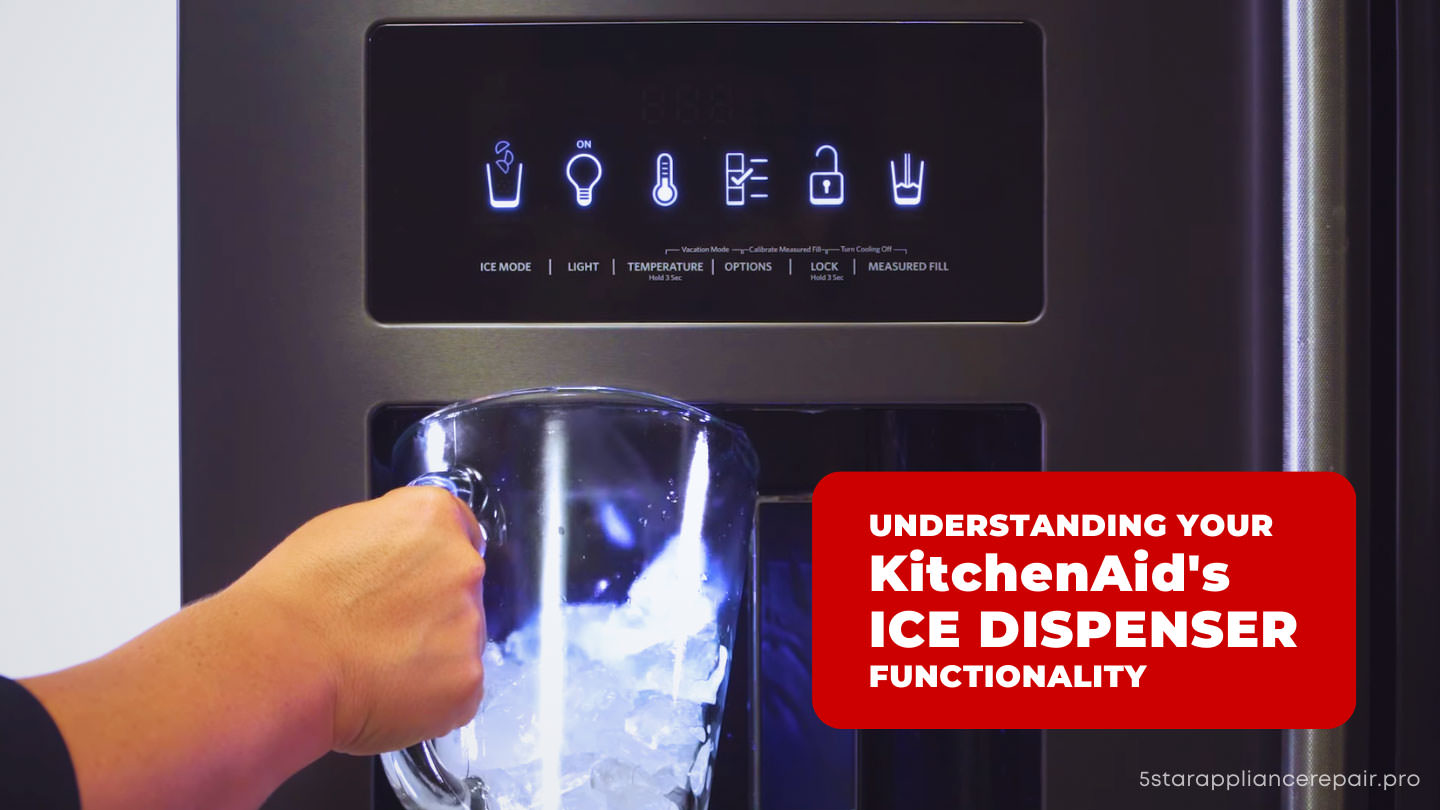
KitchenAid Ice Maker and Dispenser Issues
When it comes to KitchenAid refrigerators, users often encounter ice-related problems. The ice machine may stop working altogether, leaving you without ice. Sometimes, the fridge fails to make ice at all, which can be frustrating.
Additionally, issues with the ice dispenser can occur, making it difficult to access ice. These problems can result from various causes, including clogged water lines, malfunctioning components, or even temperature settings. Troubleshooting these issues is essential to ensure your KitchenAid refrigerator functions smoothly.
#1 - KitchenAid Refrigerator Ice Machine Not Working
If you’re dealing with a KitchenAid refrigerator ice machine not working, follow these troubleshooting steps to get it back in order.
- Check Power Supply: Ensure the refrigerator is properly plugged in and the power supply is functioning.
- Ice Maker Switch: Confirm that the ice maker switch is turned on. It’s typically located inside the freezer.
- Water Supply: Verify that the water supply to the refrigerator is connected and the water valve is open.
- Water Filter: Replace the water filter if it’s old or clogged, as this can obstruct water flow to the ice maker.
- Temperature Settings: Ensure the freezer is set at the appropriate temperature (0°F or -18°C) for ice production.
- Ice Bin: Check if the ice bin is full or jammed with ice. Empty it and clear any blockages.
- Ice Maker Reset: Reset the ice maker by turning it off for 15 seconds and then back on.
- Inspect for Leaks: Look for any water leaks around the ice maker or water inlet valve.
- Professional Help: If the issue persists, it might require professional servicing. Contact a licensed technician.
#2 - KitchenAid Refrigerator Not Making Ice
Having a problem with your KitchenAid refrigerator not making ice can be frustrating, but there are several solutions to get your ice production back on track.
- Check Water Supply: Ensure the water supply to the refrigerator is connected and turned on. A lack of water flow can lead to no ice production.
- Water Filter Replacement: Replace the water filter if it’s old or clogged. A dirty filter can obstruct water flow to the ice maker.
- Ice Maker On/Off Switch: Confirm that the ice maker switch is in the “on” position. It’s usually located inside the freezer.
- Ice Bin Inspection: Check if the ice bin is empty or jammed with ice. Clear any blockages and make sure the ice bin is properly seated.
- Temperature Setting: Ensure the freezer temperature is set to 0°F (-18°C) or lower, as ice production can be affected by warmer temperatures.
- Reset the Ice Maker: Try resetting the ice maker by turning it off for 15 seconds and then back on.
- Inspect for Leaks: Look for any water leaks around the ice maker or water inlet valve, as leaks can disrupt ice production.
Professional Help: If the problem persists, it may require professional servicing. Contact KitchenAid customer service or a technician for further assistance.
#3 - KitchenAid Refrigerator Ice Dispenser Problems
If you’re facing issues with your KitchenAid refrigerator ice dispenser not working, here are some solutions to address the problem:
- Check for Ice Blockages: Open the ice bin and inspect for any ice blockages preventing ice from dispensing. Clear any obstructions to ensure smooth ice flow.
- Ice Bin Position: Ensure the ice bin is properly seated and locked. An improperly positioned bin can hinder ice dispensing.
- Dispenser Lock: Check if the dispenser is locked. Most models have a lock feature that prevents accidental dispensing. Make sure it’s turned off.
- Frozen Water Line: If your refrigerator has a water dispenser, check if the water line supplying the ice maker is frozen. Thaw it if necessary to restore water flow.
- Water Filter Replacement: Replace the water filter if it’s old or clogged, as a blocked filter can affect ice production and dispensing.
- Test Button: Use the test button, usually located on the ice maker or dispenser panel, to check if the dispenser motor is functioning. If it’s not, it may need replacement.
- Temperature Settings: Ensure the freezer is set to the proper temperature (0°F or -18°C) to maintain ice quality.
Professional Assistance: If the problem persists, consider contacting a technician for a thorough inspection and potential repairs.
KitchenAid Refrigerator Door and Structural Problems
When it comes to KitchenAid refrigerators, users often encounter ice-related problems. The ice machine may stop working altogether, leaving you without ice. Sometimes, the fridge fails to make ice at all, which can be frustrating.
Additionally, issues with the ice dispenser can occur, making it difficult to access ice. These problems can result from various causes, including clogged water lines, malfunctioning components, or even temperature settings. Troubleshooting these issues is essential to ensure your KitchenAid refrigerator functions smoothly.
#4 - KitchenAid Refrigerator Door Doesn't Stay Closed
If your KitchenAid refrigerator door doesn’t stay closed, follow these simple solutions to address this issue:
- Check for Obstructions: Ensure there are no food items or containers obstructing the door’s closure. Overcrowding can prevent a proper seal.
- Clean Door Gaskets: Inspect the rubber gaskets around the door for dirt or debris. Clean them using mild soap and warm water. Wipe dry to maintain their elasticity and sealing capability.
- Adjust Door Alignment: KitchenAid refrigerators often have adjustable door hinges. Refer to your manual to learn how to adjust them to ensure the doors align correctly.
- Level the Refrigerator: Ensure your refrigerator is level by adjusting the leveling feet. An uneven refrigerator can cause the doors not to stay closed.
- Check for Damaged Seals: Examine the gaskets for any signs of damage or wear. If torn or cracked, it’s time to replace them with genuine KitchenAid parts.
- Reorganize Contents: Avoid overloading the refrigerator shelves. Distribute items evenly to prevent them from pushing against the doors.
- Temperature Settings: Verify that the refrigerator and freezer temperatures are set to the recommended levels. Incorrect temperatures can affect the door’s sealing ability.
- Inspect Magnetic Strips: Ensure the magnetic strips within the gaskets are intact. If they are damaged or missing, they won’t create a strong seal.
Professional Help: If the problem continues, call a qualified technician to diagnose and repair any underlying issues with the door or hinges.
#5 - KitchenAid Refrigerator Leaking or Collecting Water
If your KitchenAid refrigerator is leaking or collecting water, it’s essential to address the issue promptly to prevent damage to your appliance and surrounding areas. Adhere to these Kitchenaid fridge troubleshooting steps:
- Check the Drain Pan: Inspect the drain pan located beneath the refrigerator. If it’s full, carefully remove and empty it. Ensure it is properly positioned.
- Clear Clogged Drain Tube: A clogged drain tube can lead to water accumulation. Unclog it using a turkey baster or a pipe cleaner. Pour warm water and mild detergent down the drain to help clear any debris.
- Inspect Door Gaskets: Check the door gaskets for damage or dirt buildup. Clean them with warm water and mild soap, and ensure they seal properly.
- Level the Refrigerator: Make sure your refrigerator is level by adjusting the leveling feet. An uneven refrigerator can cause water to accumulate in the wrong areas.
- Check Ice Maker and Water Lines: If your fridge has an ice maker or water dispenser, inspect the water lines for leaks or loose connections. Tighten connections or replace damaged lines as needed.
- Examine the Defrost Drain: A blocked defrost drain can result in water accumulation. Remove any debris from the drain and clean it using a pipe cleaner.
- Inspect the Condenser Coils: Dirty or clogged condenser coils can cause excess moisture. Vacuum or brush them clean to improve cooling efficiency.
- Professional Assistance: If the problem persists or you can’t identify the source of the leak, consider contacting a technician for a thorough assessment and reliable refrigerator repairs.
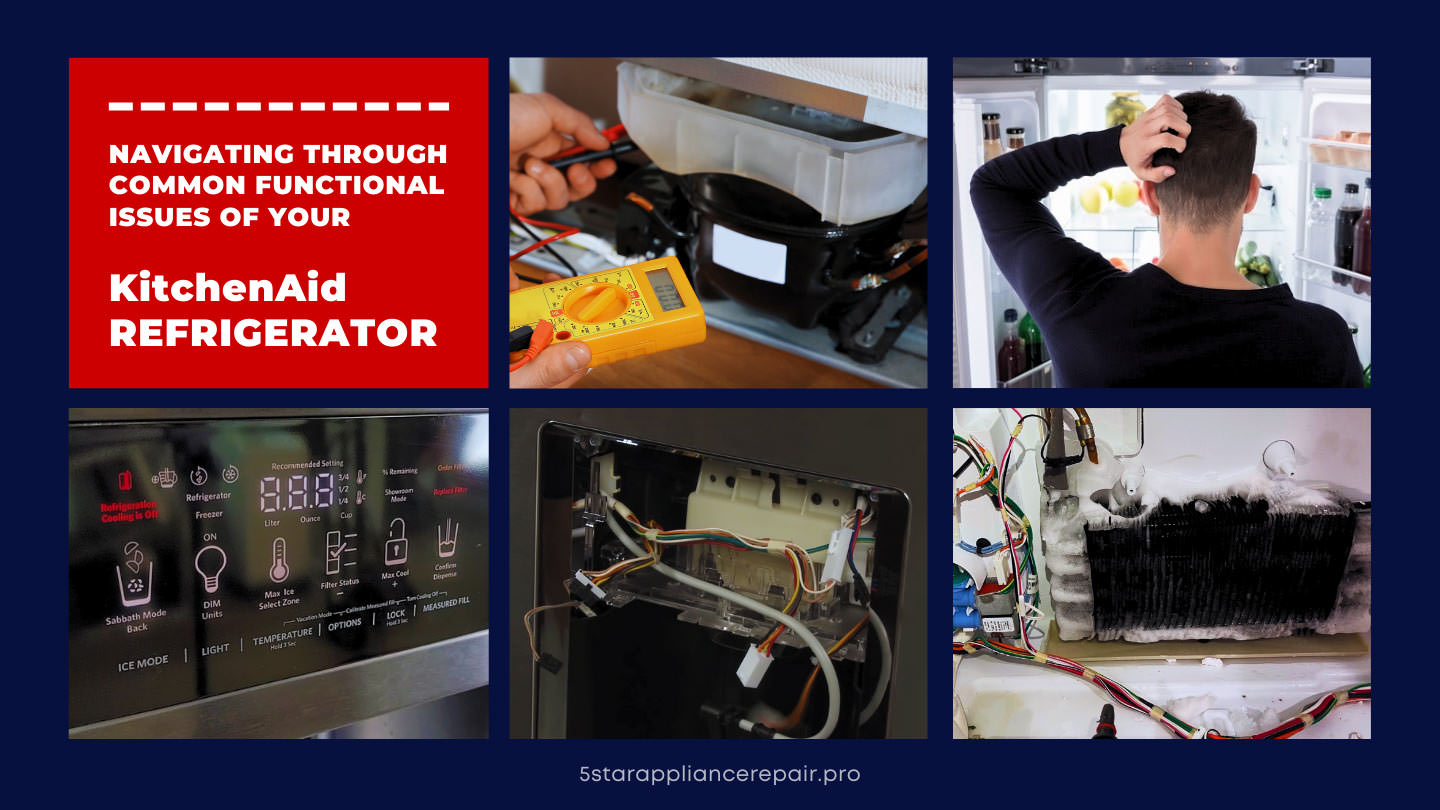
KitchenAid Refrigerator Cooling Issues
An in-depth examination of problems affecting cooling efficiency in a KitchenAid refrigerator reveals critical issues that impact its primary function. These problems can encompass compressor malfunctions, refrigerant leaks, clogged condenser coils, and inadequate ventilation. Inefficient cooling can lead to food spoilage and energy wastage.
Identifying and addressing these cooling-related concerns is crucial to ensure the refrigerator maintains a consistent and safe temperature, preserving the freshness of its contents while minimizing energy consumption and repair costs.
#6 - KitchenAid Refrigerator Not Cooling
If you’re facing KitchenAid refrigerator problems with cooling, here’s a concise guide to diagnose and resolve the issue:
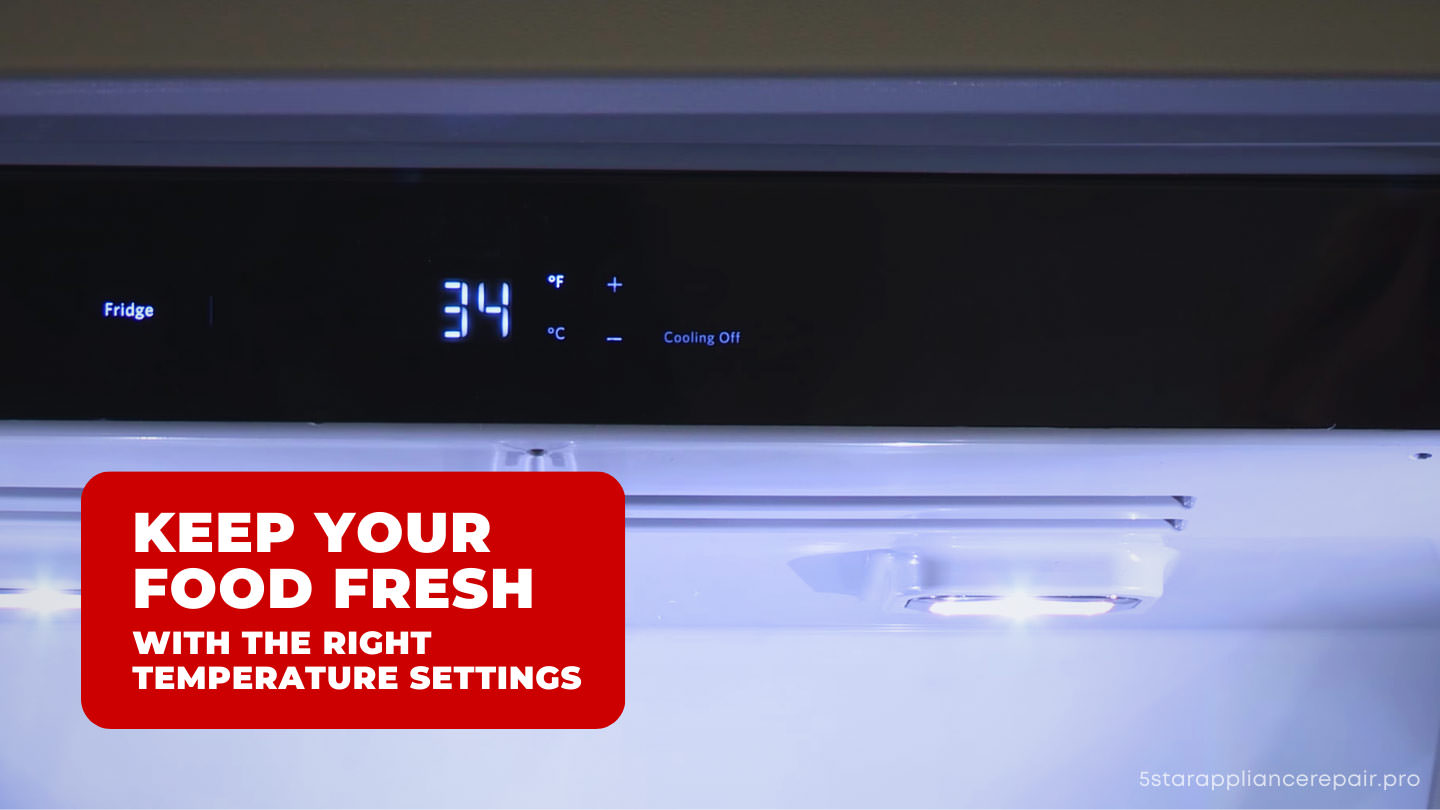
- Thermostat Settings: Check and adjust the thermostat settings to the recommended temperatures – approximately 37°F (3°C) for the refrigerator and 0°F (-18°C) for the freezer.
- Condenser Coils: Unplug the fridge and clean the condenser coils to remove dust and debris, which can impede cooling.
- Evaporator Fan: Listen for the freezer’s evaporator fan. If it’s not running, replace it to maintain proper airflow.
- Compressor Check: Listen near the back of the refrigerator for a humming sound. If absent, the compressor may need repair or replacement.
- Door Seals Inspection: Examine the door gaskets for damage or gaps. Faulty seals allow warm air in, impacting cooling. Replace damaged gaskets.
- Defrost the Freezer: If frost buildup is blocking airflow, unplug the fridge and defrost the freezer.
- Ventilation: Ensure there’s sufficient space around the refrigerator for proper ventilation.
- Air Vents: Confirm that air vents inside the fridge and freezer are unobstructed.
Professional Help: If the problem persists, contact KitchenAid customer service or a technician for a comprehensive diagnosis and necessary repairs.
#7 - Inconsistent Temperature Regulation
For effective KitchenAid fridge troubleshooting and maintaining stable refrigerator temperatures, follow these essential tips:
- Optimal Settings: Set the refrigerator and freezer to the recommended temperatures of approximately 37°F (3°C) and 0°F (-18°C), respectively.
- Avoid Overloading: Overloading the fridge can obstruct airflow, leading to temperature fluctuations. Organize items efficiently, leaving space for air circulation.
- Check Door Seals: Inspect the door gaskets for damage or gaps. Damaged seals allow warm air in, causing temperature inconsistencies. Replace faulty gaskets promptly.
- Condenser Coils Maintenance: Regularly clean the condenser coils to prevent dust buildup, which can affect cooling efficiency.
- Even Loading: Distribute food items evenly across the shelves and drawers to maintain consistent cooling throughout the refrigerator.
- Monitor Temperature: Use a refrigerator thermometer to verify and adjust temperatures as needed.
- Defrost Regularly: If your fridge has a freezer, defrost it periodically to prevent excessive frost buildup, which can disrupt temperature regulation.
- Ventilation: Ensure the refrigerator has proper ventilation space around it to facilitate heat dissipation.
- Professional Servicing: If temperature inconsistencies persist, consult a technician for a comprehensive inspection and any necessary repairs.
Noisy Operation and Sounds
When tackling sound-related issues in KitchenAid refrigerators, a crucial aspect of KitchenAid built-in refrigerator troubleshooting is addressing noise problems. Unusual sounds, including rattling, humming, or clicking, can disrupt the kitchen environment and indicate potential issues within the appliance. Common noise sources include faulty fans, malfunctioning compressors, or improper placement of items within the refrigerator.
Proper diagnosis and repair of the problems are essential to maintaining a peaceful and efficient kitchen while ensuring the refrigerator operates smoothly and doesn’t suffer from underlying mechanical issues.

#8 - Solving Unusual Noises
Unusual noises from your refrigerator can be concerning, but identifying and rectifying them is crucial to ensure its proper functioning. Here are common abnormal refrigerator noises and their potential solutions:
- Clicking or Tapping: These sounds often result from the refrigerator’s defrost timer or ice maker. If they persist, consider professional servicing to check and replace the faulty components.
- Buzzing or Humming: A buzzing or humming noise may be due to the compressor, condenser fan, or ice maker. Ensure the fridge is level, and if the noise continues, consult a technician.
- Rattling or Vibrating: Loose components like condenser coils, pipes, or water lines can cause rattling or vibrating noises. Tighten or secure them to eliminate the sound.
- Gurgling or Water Flow: Hearing gurgling sounds is normal when the refrigerant flows through the coils, but if it’s excessive, it may indicate a refrigerant issue. Consult a technician for inspection.
- Sizzling or Popping: These sounds can occur when the fridge changes temperature. They are usually harmless. However, if they persist or intensify, a professional assessment is recommended.
Loud or Continuous Noise: If your refrigerator makes loud or continuous noises, it could indicate a malfunctioning fan, motor, or compressor. Contact a technician for a thorough diagnosis and necessary KitchenAid appliance repair service.
#9 - Reducing Operational Noise
To minimize regular operational sounds and ensure your KitchenAid fridge operates quietly, follow these tips:
- Level the Appliance: Ensure the refrigerator is level by adjusting the leveling feet. An uneven fridge can produce more noise.
- Proper Loading: Organize items inside the fridge to avoid overcrowding and obstructing the airflow. This helps reduce strain on the appliance’s components.
- Maintain the Condenser Coils: Regularly clean the condenser coils at the back or beneath the fridge to prevent dust buildup, which can lead to increased noise.
- Check for Loose Items: Inspect the interior for loose items that may rattle when the fridge is running. Secure them to reduce noise.
- Monitor Temperature Settings: Ensure the refrigerator and freezer are set to the recommended temperatures (37°F or 3°C for the fridge, 0°F or -18°C for the freezer) to minimize excessive cooling cycles.
- Defrost Regularly: If your fridge has a manual defrost option, defrost it periodically to prevent ice buildup, which can contribute to noise.
- Inspect Door Seals: Ensure the door gaskets are clean and in good condition, providing an airtight seal that reduces noise from the compressor.
Professional Maintenance: Consider professional servicing if unusual operational sounds persist, as they could indicate underlying issues with components like fans, motors, or compressors.
Operational and Functional Concerns
Operational and functional concerns in a refrigerator encompass a variety of issues, including temperature fluctuations, condensation buildup, inadequate cooling, faulty sensors, and energy inefficiency. These issues can impact the refrigerator’s ability to preserve food properly and efficiently, affecting its overall functionality and performance. Addressing these operational challenges is crucial to ensuring the refrigerator’s effectiveness in maintaining food freshness and safety.
#10 - KitchenAid Freezer Not Freezing Properly
If your KitchenAid freezer is not maintaining proper temperatures and you’ve noticed that your KitchenAid stopped making ice, you can take the following steps to address the issue:
- Check Temperature Settings: Verify that the freezer is set to the recommended temperature of 0°F (-18°C) or lower. Adjust the thermostat if necessary.
- Clean Condenser Coils: Dusty or dirty condenser coils can affect cooling efficiency. Unplug the freezer and clean the coils to ensure optimal heat exchange.
- Organize Contents: Avoid overloading the freezer, as overcrowding can obstruct airflow, hindering the freezer’s ability to maintain proper temperatures.
- Inspect Door Seals: Examine the gaskets around the freezer door for damage or gaps. Damaged seals can lead to warm air infiltration. Replace any faulty gaskets.
- Defrost if Necessary: Excessive frost buildup can impede cooling. If you notice significant frost, manually defrost the freezer by unplugging it and allowing the ice to melt.
- Check for Blocked Vents: Ensure that food items do not obstruct air vents inside the freezer, as proper airflow is essential for efficient cooling.
- Fan and Motor Assessment: Listen for unusual noises that could indicate problems with the freezer’s fan or motor. If identified, consider consulting a technician for repairs.
Professional Assistance: If the issue persists or you suspect a more complex problem, it’s advisable to seek professional diagnosis and repair to address any underlying issues with components like the thermostat, compressor, or refrigerant.
#11 - KitchenAid Refrigerator Electrical Problems
If you’re experiencing electrical problems with your KitchenAid refrigerator, like control panel malfunctions or flickering lights, it’s essential to troubleshoot and resolve these issues promptly. Start by following KitchenAid side-by-side refrigerator troubleshooting steps to pinpoint the problem:
- Check Power Supply: Ensure the refrigerator is properly plugged in and receiving power. Inspect the electrical outlet and circuit breaker to rule out any issues.
- Control Panel Reset: If the control panel malfunctions or displays error codes, perform a reset. Unplug the refrigerator for a few minutes, then plug it back in to clear any temporary glitches.
- Inspect Wiring: Examine the power cord and internal wiring for visible damage or loose connections. Any issues may require professional repair or replacement.
- Flickering Lights: Flickering lights can be due to loose bulbs or faulty light sockets. Replace any burned-out bulbs and tighten loose ones.
- Temperature Settings: Verify that the temperature settings are correctly configured for the refrigerator and freezer compartments.
- Professional Help: If the problem continues or you suspect internal electrical issues, contact a certified technician for a comprehensive diagnosis and necessary electrical repairs.
#12 - KitchenAid Refrigerator Compressor Failure
When faced with a KitchenAid refrigerator compressor failure, it’s essential to recognize the symptoms and explore potential solutions. One common issue associated with compressor problems is the KitchenAid refrigerator water and ice dispenser not working. Here’s what you should be aware of:
Symptoms of Compressor Failure:
- Warm Interior: The refrigerator and freezer compartments may not maintain the desired temperature, leading to warm food storage.
- Unusual Noises: You might hear clicking or buzzing noises from the back of the fridge, indicating compressor issues.
- Water and Ice Dispenser Problems: As mentioned, compressor failure can impact the water and ice dispenser’s functionality, resulting in no water or ice being dispensed.
Solutions:
- Compressor Replacement: If the compressor is found to be faulty, it may need replacement. This is a complex repair that a qualified technician should perform.
- Warranty Considerations: Check your refrigerator’s warranty, as compressor replacements may be covered.
Professional Diagnosis: When you suspect compressor problems, it’s crucial to consult a KitchenAid technician or an appliance repair expert to confirm the issue.
#13 - KitchenAid Refrigerator Defrosting Issues
When dealing with defrosting issues, follow these steps to address problems with the automatic defrost function:
- Manual Defrost: If you notice excessive frost buildup, unplug the refrigerator and remove all contents from the freezer. Leave the freezer door open to allow the ice to melt naturally. Be prepared to collect water as it thaws.
- Check the Defrost Timer: Locate the defrost timer (often in the control panel or behind the kickplate) and manually advance it to the defrost cycle. If the refrigerator enters the defrost mode, the timer may be malfunctioning and require replacement.
- Inspect the Defrost Heater: Test the continuity of the defrost heater using a multimeter. If it fails the test, replace it, as it won’t effectively melt frost.
- Examine the Defrost Thermostat: Test the defrost thermostat for continuity. If it doesn’t pass the test, replace it, as it may be preventing proper defrosting.
- Check the Defrost Control Board: If your refrigerator has one, the defrost control board may be faulty. Consult your refrigerator’s manual for testing and replacement procedures related to the Kitchenaid refrigerator control board troubleshooting.
Professional Assistance: If these steps do not resolve the issue, consider calling a qualified technician for a diagnosis and any necessary Kitchenaid appliance repairs to address defrosting problems.
#14 - KitchenAid Refrigerator Sensor Malfunctions
When dealing with temperature and humidity sensor malfunctions, follow these steps to diagnose and rectify the issues:
- Initial Inspection: Begin by checking the refrigerator’s display for error codes or alerts related to temperature or humidity. This can provide valuable clues.
- Visual Inspection: Inspect the sensors and their wiring for any visible damage or loose connections. Ensure they are clean and free from debris.
- Reset the Refrigerator: Sometimes, a simple power cycle can resolve sensor issues. Unplug the refrigerator for a few minutes and then plug it back in.
- Check Temperature Settings: Verify that the refrigerator and freezer temperature settings are appropriate. Adjust them if necessary, allowing some time for the temperature to stabilize.
- Calibration: Some models offer calibration options for sensors. Consult the user manual to see if your model provides this feature, and follow the instructions to calibrate the sensors.
- Replace Sensors: If the issues persist, consider replacing faulty sensors. Refer to your user manual or seek professional assistance for sensor replacement.
Call an Expert Technician: If you cannot diagnose or rectify the issue, contact a certified KitchenAid technician for further Kitchenaid french door refrigerator troubleshooting or other KitchenAid refrigerator models.
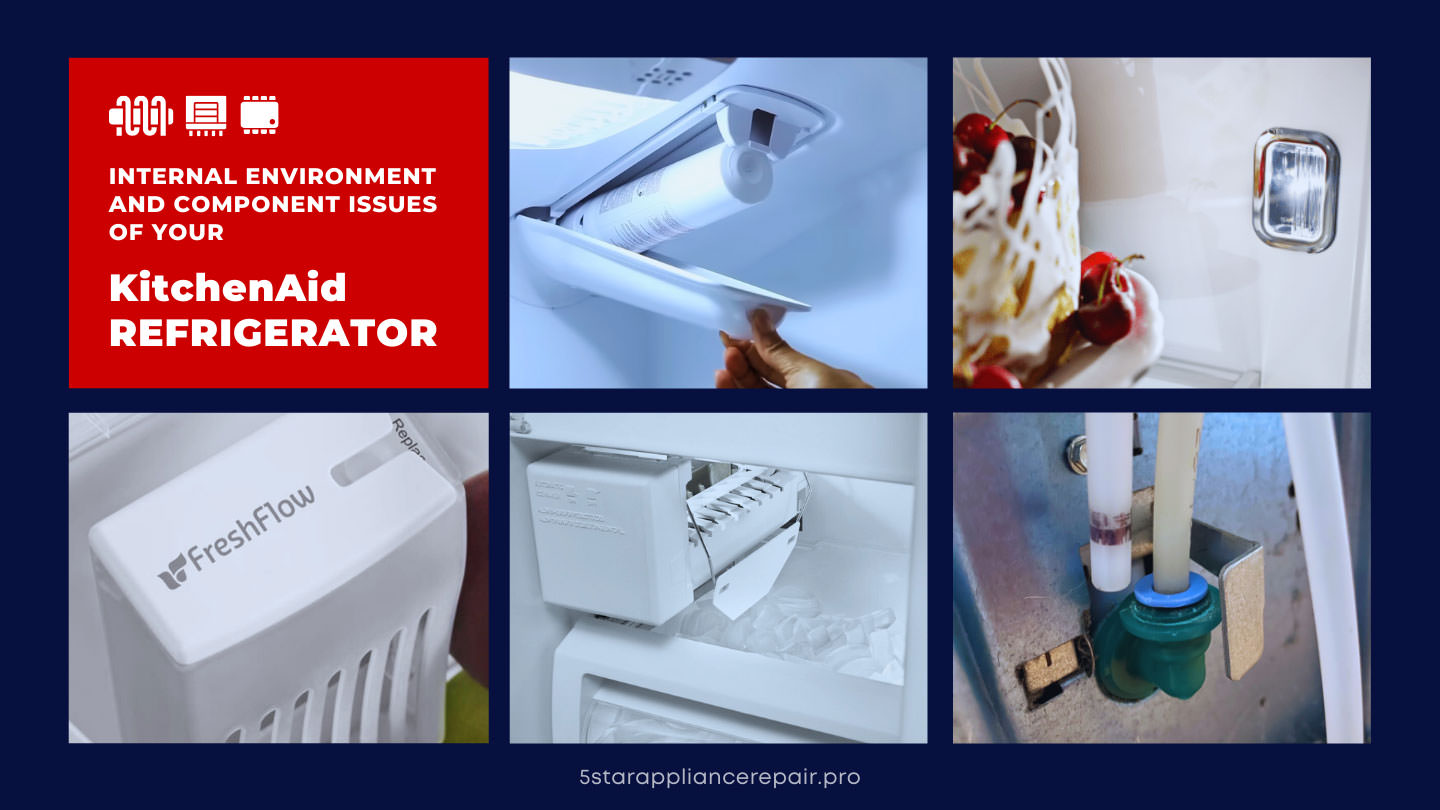
Internal Environment and Component Issues
Examining problems related to the internal environment and specific components of a refrigerator is crucial for its optimal functionality. These issues encompass diverse concerns, such as eliminating odors affecting food quality, addressing water filter problems for clean and safe water supply, and resolving light malfunctions for convenient access to contents.
By addressing these internal and component-related issues, users can ensure their KitchenAid refrigerator maintains a hygienic, efficient, and user-friendly environment for their stored items.
#15 - Eliminating KitchenAid Refrigerator Odors
To fix ice maker KitchenAid refrigerator odors and prevent them from returning, follow these techniques:
- Clean the Interior: Start by removing all food items and shelving. Clean the interior with a mixture of warm water and baking soda. This helps neutralize odors and removes any food residues.
- Check for Spoiled Food: Discard expired or spoiled food items that might be the source of the odor.
- Deep Clean the Ice Maker: Use warm soapy water to thoroughly clean the ice maker components. Pay attention to the ice bin and dispenser area, where mold and bacteria can develop.
- Replace Water Filter: An old or clogged filter can contribute to unpleasant tastes and odors in ice and water. Replace it according to the manufacturer’s recommendations.
- Regularly Defrost Freezer: Ice buildup in the freezer can lead to odor issues. Defrost the freezer regularly to prevent this.
- Use Odor Absorbers: Place an open box of baking soda or activated charcoal inside the fridge and freezer to absorb lingering odors.
- Keep it Well Ventilated: Ensure proper ventilation by not overloading the fridge and allowing air to circulate freely.
Store Strong-Smelling Foods Properly: Use airtight containers for strong-smelling foods to prevent their odors from permeating other items.
#16 - KitchenAid Refrigerator Water Filter Issues
Common problems with KitchenAid refrigerator water filters, including leaks and inefficiencies, can be addressed with these steps:
- Shut Off Water Supply: Before working on the water filter, turn off the water supply to the refrigerator to prevent leaks.
- Replace the Water Filter: If your filter is old or expired, replace it with a new, genuine KitchenAid filter designed for your refrigerator model. Follow the manufacturer’s instructions for proper installation.
- Check for Leaks: Inspect the filter housing for any signs of leaks or cracks. Tighten any loose connections or replace the housing if damaged.
- Bypass the Filter: If you suspect the filter is causing issues, bypass it temporarily to see if the water flow improves. If it does, replace the filter.
- Flush the System: After replacing the filter, run several gallons of water through the dispenser to flush out any air or impurities that may affect taste or efficiency.
- Inspect Water Lines: Check for kinks or pinches in the water supply lines, as these can restrict water flow. Ensure they are properly connected and free from obstructions.
Professional Help: If you cannot resolve it, consider contacting a licensed technician for thorough repairs.
#17 - KitchenAid Refrigerator Light Malfunction
If you’re experiencing issues with the interior lighting of your KitchenAid refrigerator, whether it’s a bulb replacement or electrical fault, follow these steps to address the problem:
- Safety First: Unplug the refrigerator or turn off the power supply to avoid electrical accidents.
- Check the Bulb: Start by inspecting the light bulb. If it’s burnt out or damaged, replace it with a compatible appliance bulb. Ensure it’s screwed in tightly.
- Test the Bulb: If the new bulb doesn’t work, try testing it in another socket to ensure it’s functioning correctly.
- Door Switch: The interior lights are often controlled by door switches. Inspect the switches for any visible damage or loose connections. Replace or reattach as needed.
- Fuse or Circuit Breaker: Check your refrigerator’s fuse or circuit breaker. If it has tripped or blown, reset it or replace the fuse.
- Wiring and Connections: Inspect the wiring and connections within the light assembly for any signs of wear or damage. Repair or replace as necessary.
Control Board: If none of the above steps resolve the issue, there might be a problem with the refrigerator’s control board. Consult the user manual or contact a technician for professional assistance.
Preventive Maintenance Tips for KitchenAid Refrigerators
To ensure the efficiency and longevity of your KitchenAid refrigerator and avoid common issues like KitchenAid side-by-side built-in refrigerator problems or ice maker in KitchenAid refrigerator not working, follow these preventive maintenance tips:
- Regular Cleaning: Clean the interior and exterior of your refrigerator regularly. Wipe spills immediately and remove expired items to prevent odors and mold growth.
- Temperature Settings: Maintain proper temperature settings. Keep the fridge between 37-40°F (3-4°C) and the freezer at 0°F (-18°C).
- Airflow: Avoid overloading the refrigerator, as this can obstruct airflow and cause uneven cooling. Allow space between items for proper circulation.
- Gasket Check: Inspect the door gaskets for cracks or damage. Replace them if necessary to maintain a tight seal and prevent air leaks.
- Condenser Coils: Clean the condenser coils at least twice a year. Dust and debris can accumulate, affecting cooling efficiency.
- Ice Maker Maintenance: If you encounter issues with the ice maker, such as it not working, check for clogs in the water line and ensure the freezer temperature is adequate.
- Water Filter Replacement: Change the water filter as recommended by KitchenAid to maintain water quality and ice maker performance.
- Proper Loading: Ensure food items are properly covered and sealed to prevent moisture loss and freezer burn.
- Defrost Regularly: If you have a manual defrost model, defrost the freezer regularly to prevent ice buildup, which can affect efficiency.
Annual Check-Up: Consider an annual professional inspection to detect and address potential issues before they become major problems.
When to Call a Professional
If you encounter persistent problems with KitchenAid French door refrigerators or other KitchenAid refrigerator models, such as KitchenAid fridge not making ice or other issues like erratic cooling, excessive noise, or leaks, it’s advisable to call a professional technician from 5 Star Appliance Repair Pro.
Signs like unusual odors, frequent temperature fluctuations, or visible damage should also prompt professional intervention. Attempting DIY fixes in these cases can worsen the problem or void your warranty. A trained technician can diagnose and address complex issues, ensuring your refrigerator operates efficiently and reliably.
Conclusion
In conclusion, KitchenAid refrigerators offer a wide range of features and functionalities, but like any appliance, they can encounter various issues over time. This comprehensive guide has explored 17 common problems that KitchenAid refrigerator owners may face, providing detailed troubleshooting and DIY repair solutions for each. By understanding your refrigerator’s components and potential issues, you can save time and money by addressing problems yourself.
However, it’s crucial to recognize when it’s time to call a professional technician for complex repairs or issues beyond your expertise. By following preventive maintenance tips and timely professional assistance when needed, you can ensure your KitchenAid refrigerator remains reliable, efficient, and a long-lasting asset in your kitchen.