
Is your washing machine full of water and refusing to drain? Are your clothes coming out sopping wet at the end of every cycle, or has the machine stopped completely mid-wash? Before you call a technician, the fix is often something you can do yourself in under an hour — no plumbing experience required.
This guide walks you through every step, in order, to diagnose and fix a front-loading washing machine that won’t drain properly.
Before You Start: What's Actually Happening
When your washing machine works correctly, it washes your clothes, then at the end of the cycle it spins and drains all the water out. If that final drain isn’t happening, water stays in the drum and your clothes come out heavy and soaking wet.
The most common culprits are a blocked drainage hose, a clogged U-bend in your pipework, or — the most likely of all — a blocked drain pump filter. Coins, hair clips, and small items that slip out of pockets are usually the cause.
If you have outdoor access to where the machine drains, it’s worth checking that first to see if any water is coming out at all. If you’re in a flat and can’t check outside, work through the steps below.
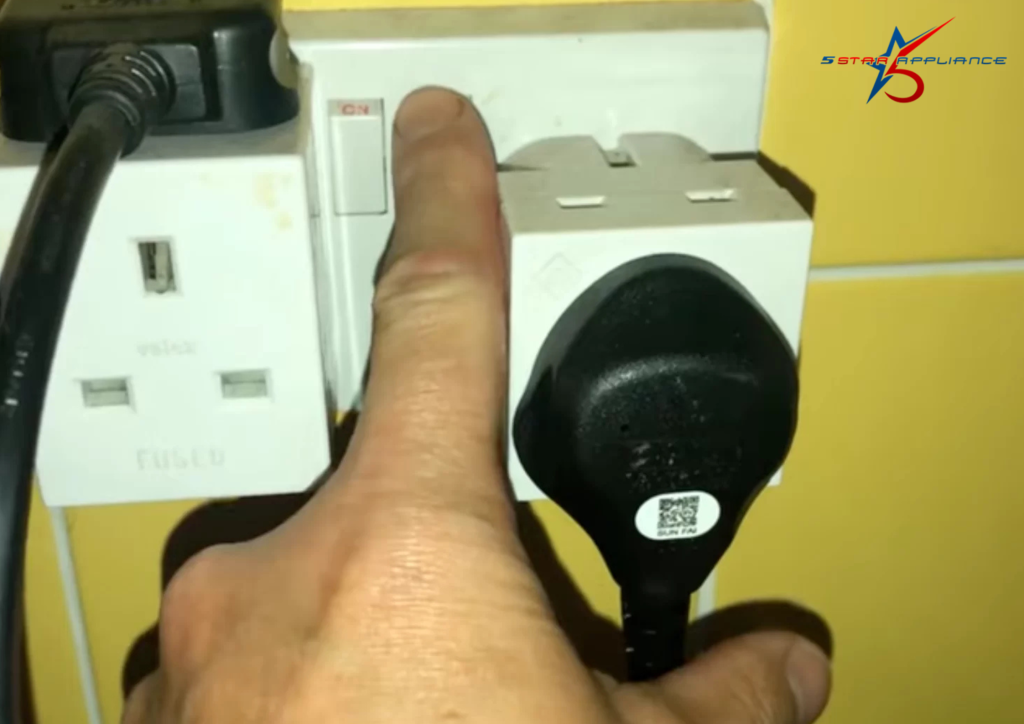
Step 1: Unplug the Machine and Cut the Power
Open the door and remove all your clothes into a washing basket. If the drum is full of standing water this can be messy, so have some old towels ready on the floor.
If the door won’t open because the machine stopped mid-cycle and the lock is engaged, you’ll need to manually release the door lock — check your machine’s manual for how to do this on your specific model.
Step 2: Empty the Drum
This is the step most people have never heard of — and it’s the single most common cause of washing machines that won’t drain. The pump filter catches lint, hair, coins, and small items before they hit the pump. When it’s clogged, water has nowhere to go.
On front-loaders, look for a small access panel at the bottom front of the machine. Open it, lay some old towels on the floor, and slowly turn the filter cap counterclockwise. Water will trickle out — let it drain fully, then pull the filter out and rinse it clean under the tap.
On top-loaders, the filter is often located near the agitator or is self-cleaning. Check your model’s manual if you can’t locate it. Either way, cleaning this filter every 3 to 4 months will prevent most drain problems from happening in the first place.
Step 3: Pull the Machine Out From the Wall
Carefully pull the washing machine away from the wall so you can access the back. Don’t pull it too far — you have water hoses and a drainage pipe connected at the back that you don’t want to strain or disconnect accidentally. Just enough space to comfortably work behind it is fine.
The drainage hose is the pipe that comes out of the back of the washing machine and carries water away to your drain. Place an old bowl or tray underneath it, then disconnect it and check inside for any visible blockages.
If the hose looks clear, run your eye along the full length of it and make sure it isn’t kinked or bent sharply anywhere. A kinked hose is enough to stop water draining completely. If the hose looks fine, move on to the next step.
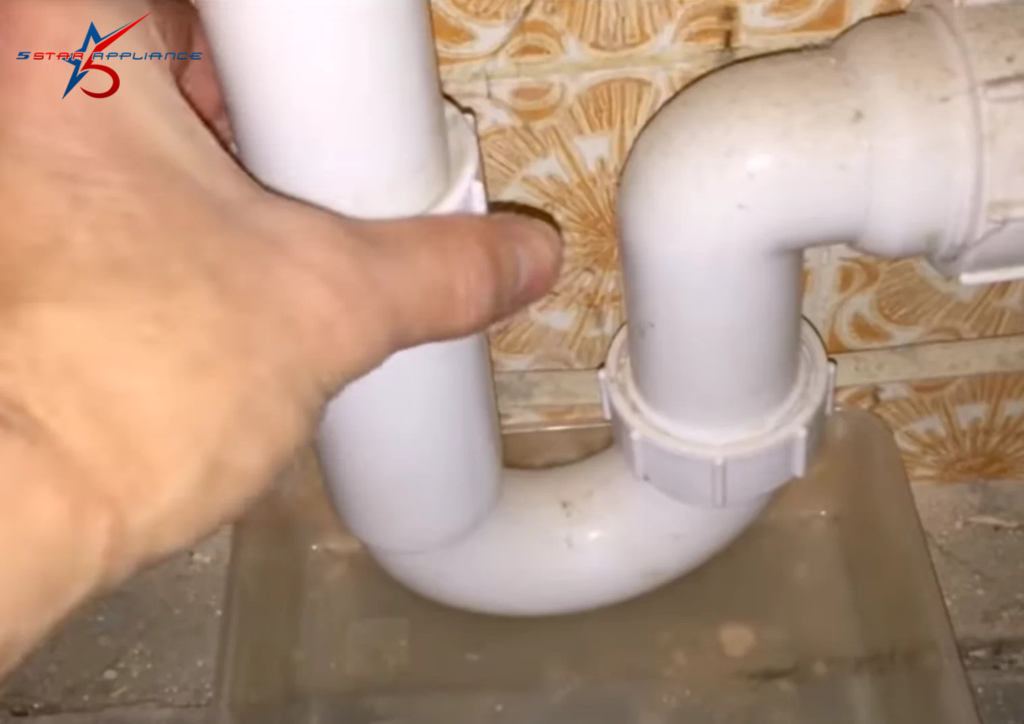
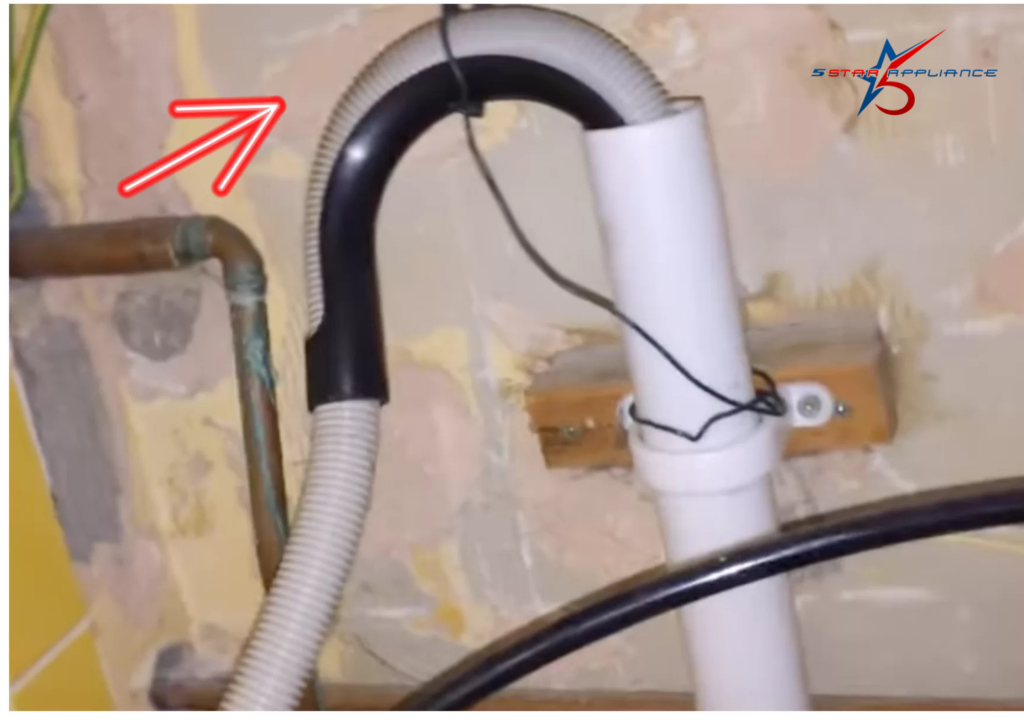
Step 6: Check the U-Bend in Your Drainage Pipework
The U-bend is a curved section of pipe in your drainage pipework that’s specifically designed to catch blockages before they go further into your plumbing. If something is blocking the drain, there’s a good chance it’s sitting here.
Place an old tray or towel underneath the U-bend to catch any water, then unscrew the plastic nuts on either side by hand. Don’t use pliers — it’s a plastic thread and you’ll damage it if you over-tighten or force it. Once removed, check inside for any gunk, hair, or debris. Fresh water sitting in the U-bend is completely normal — that’s what it’s designed to hold.
If it looks clear, screw it back together by hand and move on to the most likely cause.
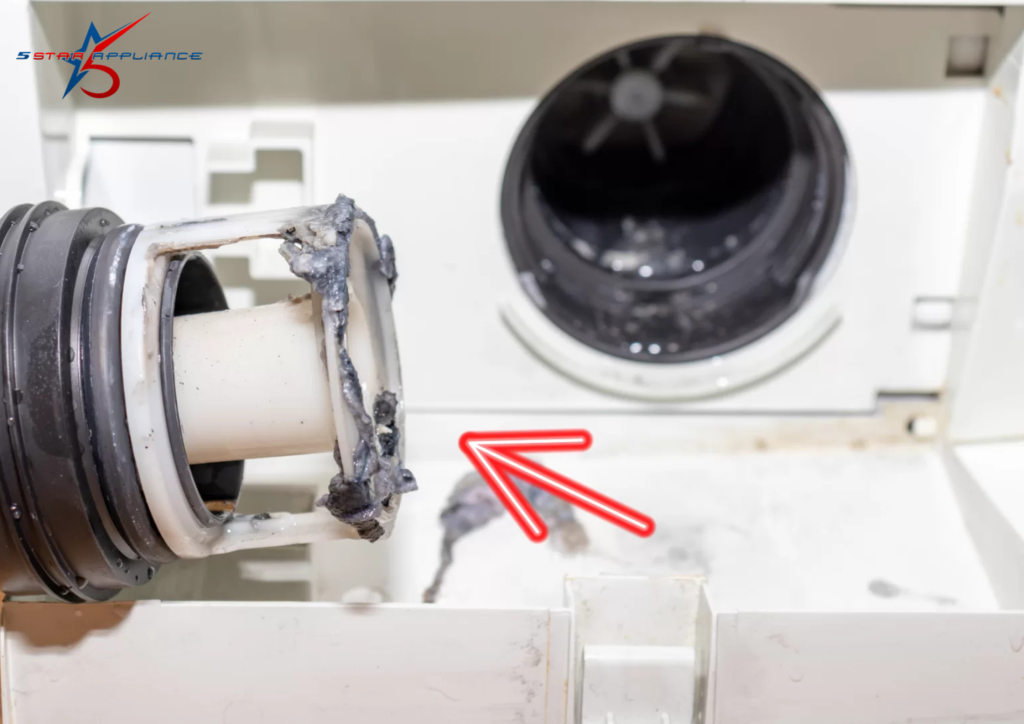
Step 7: Remove and Clean the Drain Pump Filter
This is where the problem almost always lives. The drain pump filter sits at the front of the machine, usually behind a small access panel at the bottom — often in the bottom right-hand corner depending on your make and model. Hotpoint, Bosch, and most other brands have one in a similar location, but check your manual if you’re not sure.
Before you open it, place a shallow tray and some old towels on the floor directly in front of it. Water will come out when you remove the filter cap, and sometimes quite a lot of it.
Slowly unscrew the filter cap counterclockwise. Let the water drain into your tray, then pull the filter out completely. This is where you’ll likely find the culprit — coins, hair clips, buttons, and small items from pockets are the most common finds.
In the video that inspired this guide, a coin dropped out immediately — and then a hair clip was found jammed on the drainage propeller behind the filter. That hair clip was the exact reason the machine had stopped draining. Once both were removed, the machine worked perfectly.
Check the propeller (the small plastic fan behind the filter housing) and make sure it spins freely with no obstructions. Give the filter itself a rinse under the tap, then screw it back in firmly.
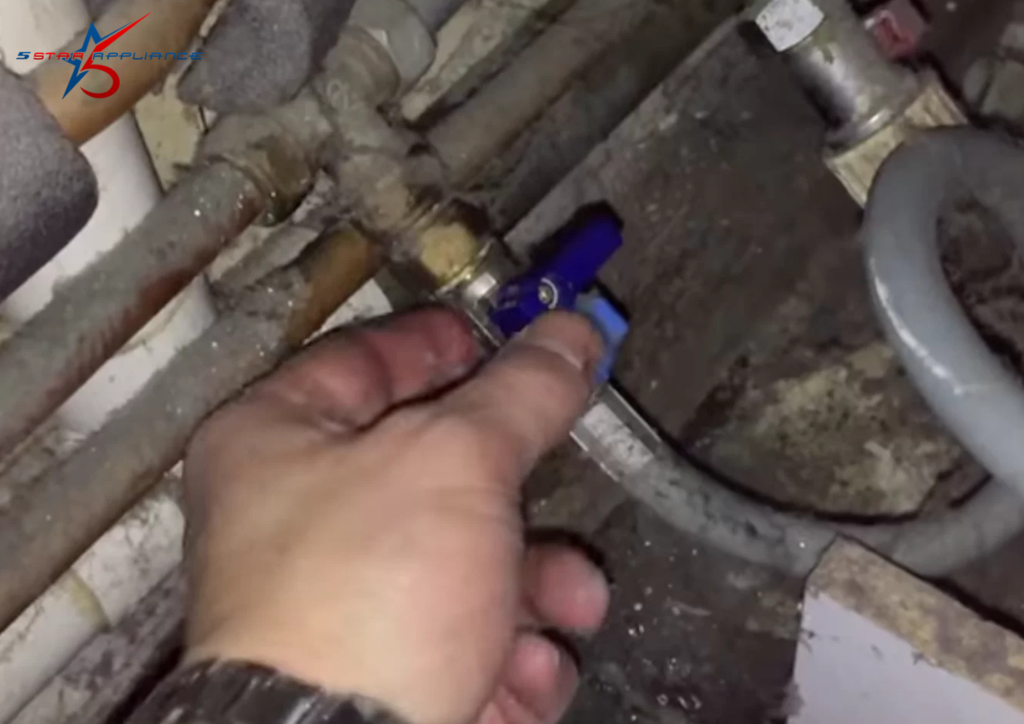
Step 8: Turn the Water Back On
Once everything is back in place, turn the mains cold water feed back on. This is easy to forget and will stop you from being able to run a wash cycle, so don’t skip it.
Step 9: Reload the Machine and Test It
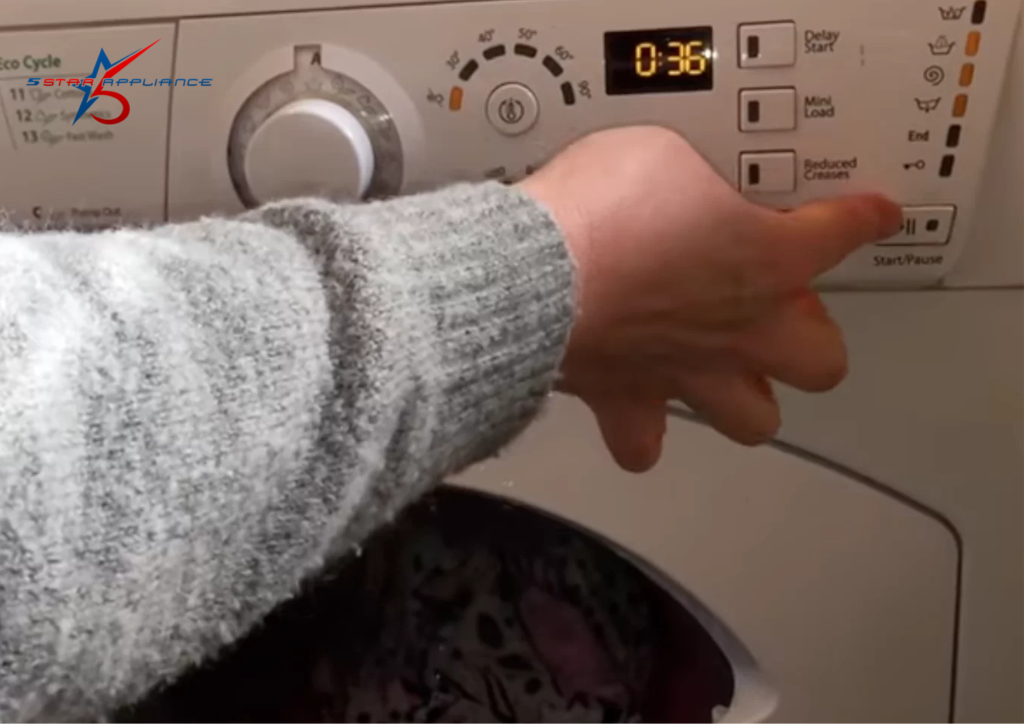
Put your wet clothes back into the drum, plug the machine back in, and turn it on. Start a wash cycle and watch to see if it drains properly at the end. If you have outdoor access to the drain outlet, go and check that water is coming out freely.
If you’re still not sure whether the drainage itself is working correctly, you can test it by taking the drainage hose and placing it directly into a sink or a large washing-up bowl, then running a cycle. You’ll immediately be able to see whether water is flowing out properly.
Step 10: Run a Hot Drum Clean Cycle
Once you’ve confirmed the machine is draining again, run a super hot wash with no clothes in it — on the hottest setting your machine offers. This flushes out all the pipework and clears any residue or buildup inside the machine left behind by the blockage. It’s also just good general maintenance to do every month or two regardless.
When to Call a Technician
These steps fix the vast majority of washing machine drainage problems. However, call a professional if:
- You find no blockage in the filter or hose but the machine still won’t drain
- The drain pump propeller is broken or won’t spin at all
- The machine makes a loud grinding noise when trying to drain
- Water is leaking from anywhere on the machine during the test cycle
- The machine shows an error code related to the motor or control board
FAQs
Why is my washing machine not draining?
Most likely a blocked drain pump filter. Coins, hair clips, and small items from pockets collect in the filter over time until water can’t pass through. Cleaning it takes about ten minutes and fixes the problem in most cases.
Do I need a plumber for this?
No. The steps in this guide require no tools and no experience. As long as you unplug the machine before you start, this is something any homeowner can do safely.
Where is the drain pump filter?
On most front-loaders it’s behind a small panel at the bottom front of the machine, usually the bottom right corner. If you can’t find it, search your model number online.
How much water will come out when I open the filter?
Potentially a lot, especially if the machine stopped mid-cycle. Always put a shallow tray and old towels on the floor before you open the filter cap — and open it slowly.
Can I use pliers to unscrew the filter or U-bend?
No. Both are plastic and hand-tighten only. Using a wrench risks cracking the thread and turning a simple fix into an expensive one.